Windows File Auditing

Inspiration
Our previous post covered USB tracking via native Windows event logs.
A follow up question by one of our valued customers was:
Ok, so you’ve demonstrated how I can easily identify and track USB devices in my environment, but how can I track data flows? How can I track what data has moved to the USB device?
Our answer: Windows File Auditing
Windows file system auditing is an important tool to keep in your Blue-Team forensic toolbox.
When you experience a cyberattack / breach, you have to be able to pinpoint exactly what the attacker viewed, changed, or stole. This kind of insight requires a complete file system auditing system.
File system auditing is a requirement for any modern data security strategy, but file analysis is the better alternative. File analysis processes and raw file audit data can make the collection of this information easier. A comprehensive file analysis log will show you what data an attacker or malicious insider tried or succeeding in accessing and stealing.
How to Enable Windows File System Auditing
In the Group/Local Policy editor, click through to Computer Configuration -> Policies -> Windows Settings -> Local Policies.
We’ve crossed out the legacy audit policy, and highlighted the more advanced auditing settings for Windows 10/ Server 2012.
Enable the following
- Audit File System - Success
- Audit Handle Manipulation - Success
- Audit Other Object Access - Success
If using a file server with many shares you may also want to enable:
- Audit File Share - Success
For USBs/Removable storage
- Audit Removable Storage - Success
To enable your new GPO, go to a command line and run:
gpupdate /force
Apply Audit Policy to Files and/or Folders
Next, tell Windows exactly which files and/or folders that you want to audit. Here is the procedure to set auditing up for your folders.
Right-click the file or folder in Windows Explorer. Select Properties.
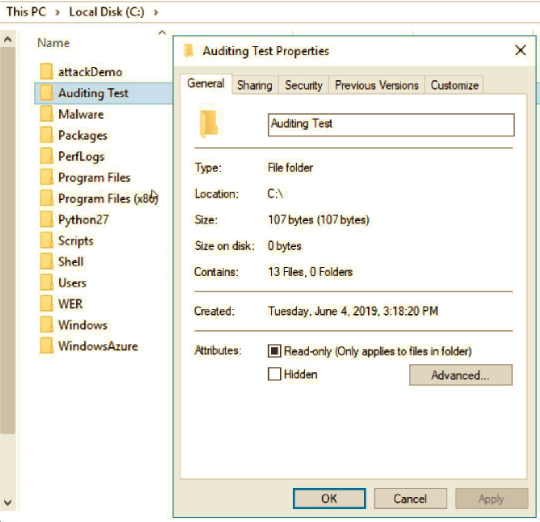
Change to the Security tab and click Advanced.
Click the Auditing tab and then Continue.
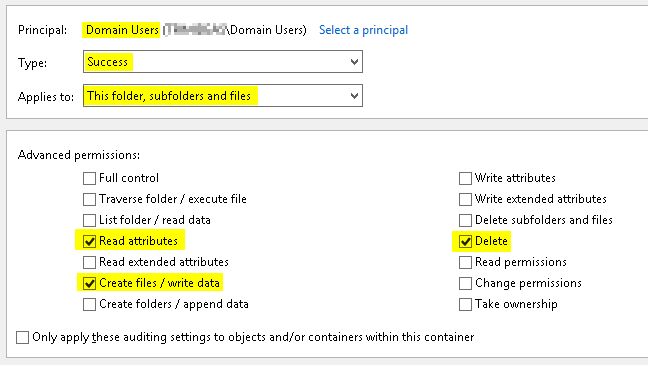
Audit Success by Domain Users.
- Read attributes……………..for renamed files/folders (to identify the new name).
- Create files / write data…for modified files.
- Delete………………………….deleted files/folders.
If you don’t care about auditing renamed folders, you can dramatically reduce the quantity of logged events by creating two auditing ACLs - one which audits all three items show above for files only, and a second which audits only the second two and applies to folders only.
Add the Users or Groups that you want to audit and check all of the appropriate boxes.
Event Viewer
Once you have enabled the Auditing GPO and set the file/folder auditing, you will see audit events in the Security Event Log in Windows Event Viewer.
Event ID 4663
ID 4663 means that an “Attempt was made to access an object.” You will see a success or failure message as part of the event, the name of the file or object, as well as the user and process that made the access attempt.
Event ID 4660
Your first question is probably, What if a file got deleted? To find out, we have to dig into the Event Log to find a corresponding event ID 4663.
Audit Event IDs Summary
The following table provides more information about each event:
| Event ID | Name | Description |
|---|---|---|
| 4656 | A handle to an object was requested | Logs the start of every file activity but does not guarantee that it succeeded |
| 4663 | An attempt was made to access an object | Logs the specific micro operations performed as part of the activity |
| 4660 | An object was deleted Logs a delete operation | The only way to verify an activity is actually deleted |
| 4658 | The handle to an object was closed | Logs the end of a file activity |
When we ask ourselves the question who touched my files? the Windows Audit Log is going to have at least four different event log entries per file read that we need to filter through and correlate before we can make any quality forensic conclusions.
Auditing made easy
This powershell script will make file auditing on servers so much easier:
To make the best use of this audit script you may wish to perform something similar on your servers:
- Create a folder called C:\Audit
- Create a folder called C:\Audit\File-Audit-Reports
- Save the script as C:\Audit\Monitor-File-Server-Activity.ps1
- Create a scheduled task to run it every day at 11:45pm.
schtasks /create /ru SYSTEM /tn "Monitor file server activity" /sc daily /tr "Powershell.exe -nologo -noprofile -noninteractive -ExecutionPolicy Bypass -File C:\Audit\Monitor-File-Server-Activity.ps1" /ST 23:00An alternative, or especially for workstations you want to collect your security event logs into your SIEM solution.
Share on: